
1. Download bots
Zbot_1.6.zip It is a
good idea to back up your current settings just in case. Choose – copy the entire cstrike folder somewhere, or just the “liblist.gam” file because changes are made to it.
2. Unzip
The cstrike folder appears, copy it to your directory where the CS is installed. Replace the existing cstrike folder.
3. Start playing
This is. You have successfully installed Zbot! Now launch Counter-Strike, make “New Game”. You will then need to add bots to the game. To do this, use either the console or press the “H” button. Pressing it will give you a command menu where you choose what bots to add (terro,
If you prefer the console, the commands for it are given below in the article.
When a bot first enters, Zbot will analyze the map. So-called waypoints are automatically created. The analysis takes 10 sec. up to 5 minutes, depending on how big the card is. When the process is complete, Zbot will restart the card and you are ready to play!
Commands for Zbot
1. Changing the Command Menu Button
By default, the command menu is called from the “H” button. To change it, open the console and type:bind “button” “+ commandmenu”
unbind “H”
2.
BOT CONTROL bot commandsbot_add bot_add_t bot_add_ct
The above commands add bots. “bot_add” will add a bot to the team specified by the “bot_join_team” cvar. “bot_add_t” and “bot_add_ct” cause the bot to join the respective team.bot_kill <name, “all”>
This command accepts the name of the bot or the word “all” – killing all the bots.bot_kick <name, “all”>
This command accepts the name of the bot or the word “all” – it clicks all the bots.bot_knives_only
bot_pistols_only
bot_snipers_only
bot_all_weapons
These commands are shorts that set bot_allow_ * cvars accordingly.
BOT Controlbot_difficulty [0-3]
This cvar determines the difficulty of all newly created bots (already added ones will remain with the difficulty at which they were created). 0 = easy, 1 = normal, 2 = difficult, 3 = expert. Values greater than 3 are automatically reduced to 3.bot_quota <minimum number of bots>
Setting this cvar to a non-zero value will cause the given number of bots to be added to the game. If a bot is clicked, a new bot is added to fill the quota. To deactivate the quota, set it to 0.bot_prefix <string>
The specified <string> will be prefixed to the name of all subsequently added bots. This is useful for “clan-tagging”.bot_join_team [ct, t, any]
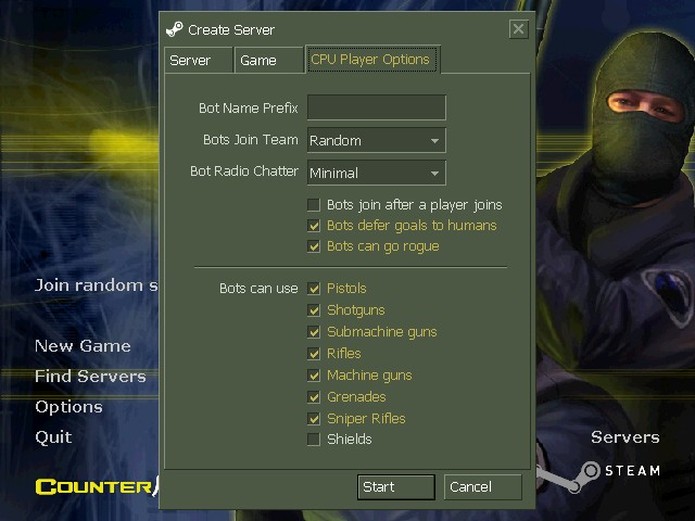
Determines which team the bots join.bot_join_after_player [0,1]
At non-zero value, the bots will wait for at least 1 person to join for them to enter.bot_allow_pistols
bot_allow_shotguns
bot_allow_sub_machine_guns
bot_allow_rifles
bot_allow_machine_guns
bot_allow_grenades
bot_allow_snipers
bot_allow_shield
All commands of type “bot_allow” can be 0 or 1. At 0, bots will not buy or use the given weapon type.bot_allow_rogues [0,1]
At value 1, it allows the bots to become restless from time to time. Rogue bots just go and shoot and respond to all radio commands with “Negative”.
NAVIGATION MESH EDITING
Each of the following bot_nav_ commands acts on the navigation mesh, allowing you to manually tune the automatically learned data. It is recommended that the commands bind to some buttons for easy editing.
CAUTION: No undo action. Save your navigation mesh frequently.
bot_nav_mark
Marks the currently selected nav area for later operations.
bot_nav_delete
Deletes the highlighted nav area.
bot_nav_split
Splits the highlighted nav area into two new nav areas, along with the white split line.
bot_nav_merge
Merges the tagged nav area with the previously tagged nav area into a new, single nav area. The merger will only occur if the two areas are the same size along the merge line.
bot_nav_connect
Creates a one-way connection from the marked area to the currently selected area, telling bots that they can walk from the marked area to the selected area. For most areas, you will want to connect the areas in both directions. However, for some “jump down” areas, the bots can move one way and cannot return to the other.
bot_nav_disconnect
Disconnects All connections from the currently highlighted area to the currently selected area.
bot_nav_begin_area
bot_nav_end_area
These two commands allow you to create new nav areas. “bot_nav_begin_area” marks the corner of the area. “bot_nav_end_area” marks the opposite corner of the area and creates it. To cancel the operation, run the “bot_nav_begin_area” command again.
bot_nav_splice
Creates a new nav area between the currently highlighted area and the currently selected area, linking the new area bidirectionally. This command is especially useful for creating nav areas.
bot_nav_crouch
Designates the selected area as “crouch”, requiring bots to crawl through it.
bot_nav_jump
Designates the tag as “jump”. This tells the bots that they have to jump in order to cross the areas.
NAVIGATION MESH PROCESSING
bot_nav_analyze
Analyzes the navigation mesh to determine Approach Points and Encounter Spots. This may take a few minutes, depending on the size and complexity of the card.
NOTE: This command requires a bot to be in the game. The recommended procedure is to save the mesh, add a bot and quickly enter bot_analyze.
bot_nav_save
Saves the current navigation mesh on the disk. The navigation mesh (“nav” file) is automatically named accordingly on the map. For example, if the map is de_dust.bsp, the nav file will be de_dust.nav.
bot_nav_load
Clears the current navigation mesh, and loads it from disk.
NAV MESH EDITING
bot_nav_edit [0,1]
Setting this cvar to 1 allows you to manually adjust the navigation mesh of the bots. Once edit mode is enabled, bot_nav_ * commands can be used.
bot_nav_zdraw <height value>
This value determines how high above ground to draw nav meshs under nav edit mode. If the terrain is very uneven, it may be helpful to increase this value from 10 to 15. The default is 4.
bot_quicksave [0,1]
At value 1, the map analysis phase will be skipped. This is useful for manually adjusting nav files. Note that without analysis, the bots will not look around properly.
DEBUGGING – debug
bot_walk [0,1]
Forces all bots to walk (disables running).
bot_stop [0,1]
At unit value, all bots will stop moving and responding.
bot_show_nav [0,1]
With a value of one nav mesh, it is drawn along each bot.
bot_show_danger [0,1]
With a value of one, the “danger” in each nav area is drawn as a vertical line. Blue lines are a danger for CTs and reds are a danger for CTs.
bot_traceview <value>
Used for internal debugging of bot navigation.
bot_debug <value>
Used for internal debugging of bot behavior.
MISC
bot_about
Displays version and bot author information
bot_goto_mark
Makes one bot on the map move to the center of the currently marked area. This is useful for testing the permeability of specific parts of the navigation mesh.